Showing posts with label how-to. Show all posts

Sunday, July 17, 2011

Draw String Maternity Skirts

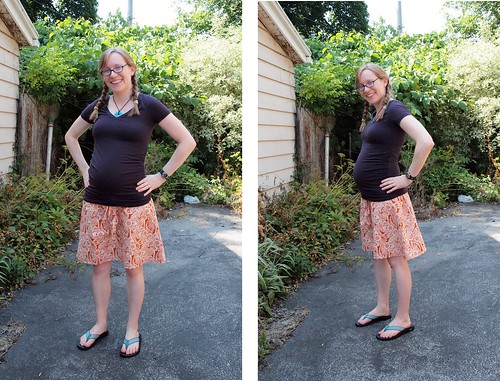
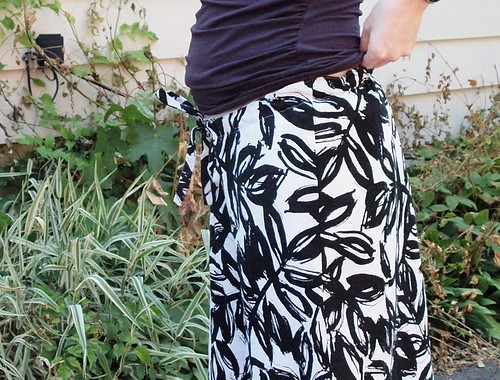
A friend of mine, Whitney (who is a seriously talented knitter), is expecting this fall. In an effort to save money and have cute, professionally appropriate maternity clothes, we made some skirts this weekend and I have to say they turned out pretty darn cute. In total, we spent $20 on material for 3 skirts! She tells me they're super comfortable, too! The key seems to be the uneven waist (we cut room for the growing belly) and elastic in the drawstring so it has some give when she sits down.

maternity skirt orange 2 views

maternity skirt waist detail


Since we're planning to make some more, I thought I'd write out our tutorial here so we have it for later and maybe it'll help someone else (if the instructions don't make sense, let me know). First, we bought 1 yard of fabric which was enough for us since Whitney is fairly petite pre-pregnancy and not particularly tall. The orange skirt above was typical cotton 44" wide fabric and the other black and white one we made with a linen type fabric from Joann that was a little bit wider, so the skirt turned out longer. We also bought another yard of a muslin-type white fabric for lining. If you want to make a bigger, fuller or longer skirt, you will probably need 2 yards of each fabric.

To figure out how big to make the skirt, we measured Whitney right below her belly figuring this was the widest part we were going to go around. She measured 38" so we used these measurements to create a 38" waist at the top and a little more fullness towards the bottom (keeping in mind 1/2" seam allowances):
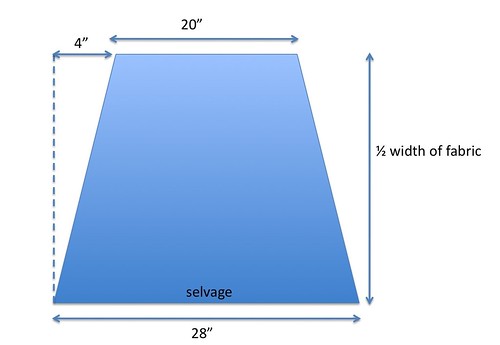
Maternity skirt digram


Then we cut out a matching piece of the lining fabric using the outer skirt piece as a pattern since the lining fabric may be shorter or longer.

After cutting, we sewed the sides of the lining and outer skirt pieces with 1/2" seams and then zig-zag to reduce the chance of fraying.

Next we put the lining and outer skirt together right sides together (one inside of the other) and folded it in half so the seams were touching. This is when we created space for the belly. We measured the height difference between the bottom of her belly in the front and where she wanted her skirt to sit in the back (about 3.5-4"), then cut that much fabric out of the FRONT half of the skirt only.
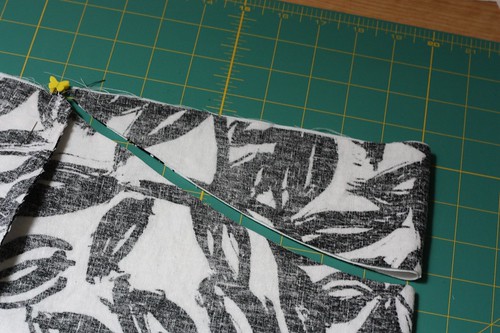
Maternity Skirt tutorial-04


Once we cut the belly piece out, we sewed the lining to the outer skirt at the waist using a 1/4" seam. Then we flipped the skirt right side out and top stitched at the top of the skirt:
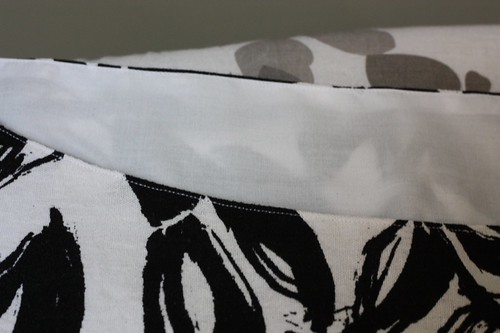
Maternity Skirt tutorial-06


Then we put in two button holes (only through the outer skirt fabric!) for the draw string
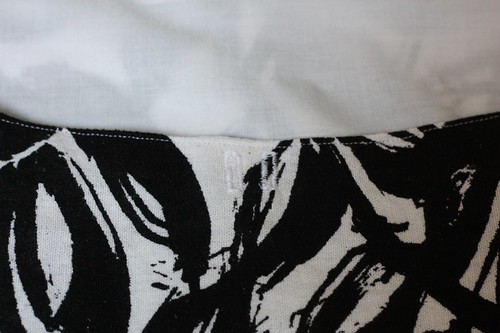
Maternity Skirt tutorial-07


Then we did a line of stitching to complete the draw string casing
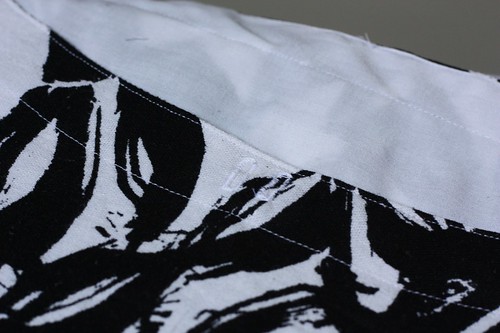
Maternity Skirt tutorial-08


And finished by hemming the bottom.

To make the draw string, we cut two pieces of fabric 2" wide and about 25" long. We folded each piece in half (the long way) right sides together and sewed along two of the open edges. We turned them right side out and pressed flat. Then sewed a 6-8" piece of elastic between the two drawstrings:
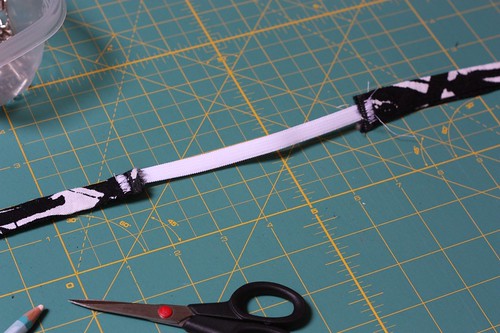
Maternity Skirt tutorial-09


Thread the draw string through the skirt and you're done!
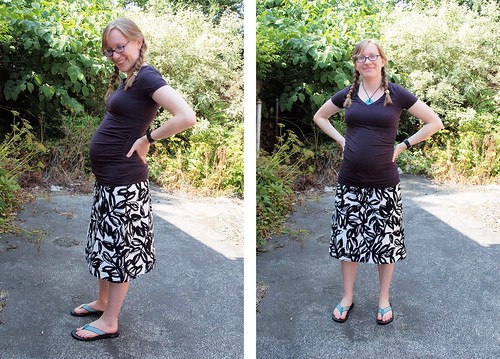
Maternity skirt black&white 2 views


From start to finish, the first one took about 2 hours and the second one only an hour and a half. Not bad for a $6 skirt! :)

Wednesday, December 9, 2009

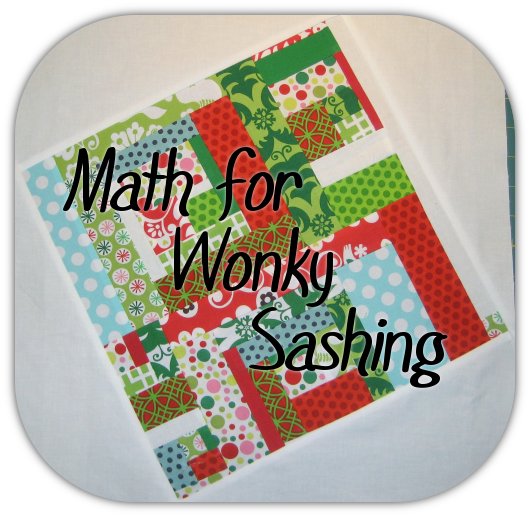
Math for Wonky Sashing

tutorial-wonky math


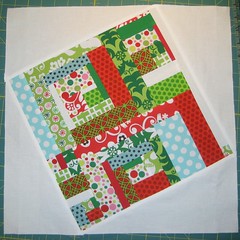
I'm loving the idea of having a lot of the blocks in my Christmas Threads quilt (like the name?) being wonky, but it also requires a bit more math than doing them completely upright with straight sashing. Since I worked out the math, I thought I'd share to save some of the hassle for anyone else that wants to give it a go.

Before I get going, I want to mention that you can do this the slightly more straight forward way that QuiltDad talks about in his tutorial for wonky log cabins. With this method, you sash the block with straight strips, then turn the block to your desired wonkiness and trim the excess. I decided not to do this since I'm worried about fabric waste (I don't have that much white left) and all the bias edges for putting together the new blocks into rows/columns, but it would work really well if you don't want to do the math and don't mind all the bias edges.

I'm first going to explain how to do the math generally and then show you how it worked out for my blocks. For your blocks, you'll first need to figure out how much you want to rotate your blocks, either a little bit (closer to 0 degrees) or a lot (closer to 45 degrees).


Then you need to figure out how big the triangles will need to be based on how much you want to turn your block. "Y" is going to be the length of one side of your finished block (for me this is 12") and here's what I mean when I say short side and long side:

In general,
short side = sine (angle of rotation) * y
long side = cosine (angle of rotation) * y

Add these two together for the size of your finished sashed block.


OR you can also look up some of these multipliers in the table below so you don't have to calculate any sines and cosines. Again, you add the short side + the long side to get the size of your finished sashed block.


short side


0.174*y


0.342*y


0.5*y


0.643*y
long side


0.985*y


0.940*y


0.866*y


0.766*y


Once you know the finished dimensions of your triangle, you need to add 7/8" (at least 1" to be safe) to each dimension (like a half square triangle). Use these two dimensions to cut a rectangle. Then cut this rectangle in half along the diagonal and it should be the right size.

Sew the triangle to your block with a 1/4" seam allowance and be careful with the bias edge. After you attached all four triangles, you can then square up all the blocks and no bias edges should be exposed.

-----------------------

For my quilt, I'm going to turn the blocks 25 degrees and I have 12" (finished) blocks so I calculated these values for the (finished) triangles:
short side = 5"
long side = 10.9"

After adding an inch to each dimension (my 1/4" seams aren't always that perfect), I cut rectangles that were 6" x 12". After adding the triangles, my blocks were about 16.5" square. This will yield a finished block that is 16" when all pieced together.

IMG_0951


-----------------------

Hopefully this made sense and is helpful. Let me know if you have questions or if you want help figuring it out for one of your quilts!

Sunday, November 22, 2009

Zoe's Jungle Quilt

Zoe's Jungle Quilt

Jon and I are really excited about how the jungle quilt turned out! We love the faces and there are more great patterns in the book we used (Quilts, Bibs, Blankies...Oh My!) Thank you so much for all of your input on my last post. After much back and forth, we agreed with most of you about the orange binding, but Jon wanted to go with a green thread after we decided to quilt with a leaf pattern (This blog has been inspiring me to quilt different designs).


Zoe's Jungle Quilt - back

If I had to pick again, I think I would've gone with a blue or orange thread. The green worked well with the motif, but does clash a little bit with the lighter blue and the pink.


Zoe's Jungle Quilt - label

The backing is Alexander Henry's 2D Zoo which is such a great print! The final size is 36"x36" which is the same size as the quilt I made for Little B. It's a little on the small side, but with how much use Little B's parents have been getting from theirs, I think it works!


Zoe's Jungle Quilt

Jon and I are going to meet Zoe this week when we head down to Philly for Thanksgiving and I can't wait! Her parents don't know we've been working on this and I'm not sure they are even aware that I sew as much as I do.

As I mentioned, we decided to go with a meandering leaf design for the quilting. I also quilted around the outer edges of the animals in the same colors I did the satin stitch applique. After a bunch of doodling, I figured out a fairly straight forward way to do the leaves. I'm still really new to free motion quilting but I didn't find the leaves much harder than a stippling. Since it's hard to see on the quilt, here's what the practice swatch looked like:


Leaf Quilting Practice
Since it took me a little while of doodling to figure out how to make this shape, I figured I'd share how I did it.
Leaf Quilting Step-by-Step


As a side note, I did want to mention that I heard concerns about using invisible thread for a baby quilt. Since the nylon thread doesn't break like natural fibers, it could get caught around a small finger. I tried getting more information about this but I couldn't find a good source, but it is something to keep in mind when picking threads.


Saturday, November 7, 2009

Pieced Flower Tutorial

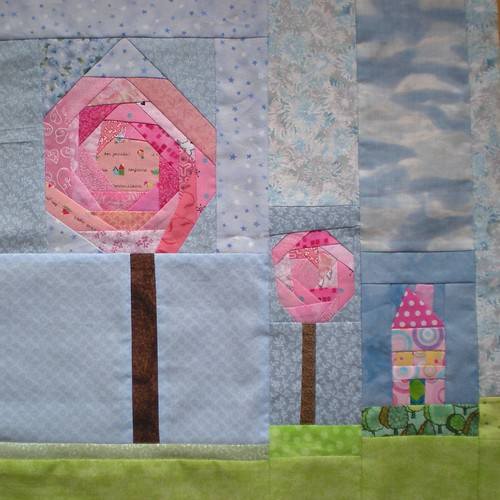
As requested, here's a tutorial on how I made the pieced log cabin style flowers I posted a few weeks ago. First, I'd like to credit where I got the idea. Byneedleandthread made this awesome block for a quilting bee and I was completely taken by it. She mentioned that she did it like a log cabin, so I just tried it out and it worked really well for me. Aren't these trees so cool?!

So here's how to do it with pictures to help along the way.


First cut strips of fabric for the outer rings of the flower/tree. I cut 1.25" strips since I was using some leftover charm squares and that's an easy size to work with.

Cut a shape for the center of the flower. I did both hexagons and pentagons the first time and I like the look of the hexagon centers better, so I cut a hexagon shape. It looks like ByNeedleandThread used a octagon. I didn't worry about it being perfect or anything. I think the improvisational look is what makes these so fun! It's fairly small, but keep in mind that you are going to lose some of its size in the seam allowances.


Take a strip from your pile and pick a side of your shape to add it to and line up the edges. Sew 1/4" seam.

Instead of running to the iron to press each seam, I just finger-pressed each seam towards the outside and then pressed after I went all the way around. If you like to press each seam, go for it!


Grab the next strip and line it up with the next edge of the center shape (I go clockwise around) and trim the tail of the first strip.


If you look closely, you can see I already sewed that last seam before I trimmed. I prefer to do it before because it makes the seams easier to keep straight, but you can do it either way.

Keep adding strips around the center. When you get to last strip, it looks a little crazy and tricky to figure out where to trim:


Flip it over. It makes it easier to trim the other strips so they're not in the way.

After going all the way around the center, press with an iron.

 
The next step is where I think the fun comes in. In the tree block, you'll notice that ByNeedleandThread kept all of her logs parallel to each other. In the flowers that I did, I liked to rotate the logs a little bit so they had a little more movement to them. Trim your flower how you want it to look for the next round. I haven't done enough of these to have a good sense about what's going to look best, but they seem really forgiving.

Go around your flower just like the first time. I purposely started on a different side than the first time so that the shortest and longest edges are always in the same place. Here's what mine looked like after the second time around.
 
Two rings of strips looked like it would be enough, so I attached this whole thing to fusible web and trimmed it to a flower looking shape.
When you applique this on, you'll want to make sure to sew around the edge (either with a straight stitch or with zig zag). Because of the seams, not all the fabric is attached to the fusible web. This probably makes more sense once you do it.

I hope this is helpful and if you have questions or are having trouble, I'd be happy to help! Have fun!!

Thursday, July 2, 2009

Circles!

For Snip.Sew.Send. this month, Chen (aka Mushyhed) sent some awesome fabrics and I knew I wanted to do a block with circles. I've done raw edge appliques and appliques with a satin stitch, but for this, I really wanted to do circles that have the soft edge without the stitching showing.

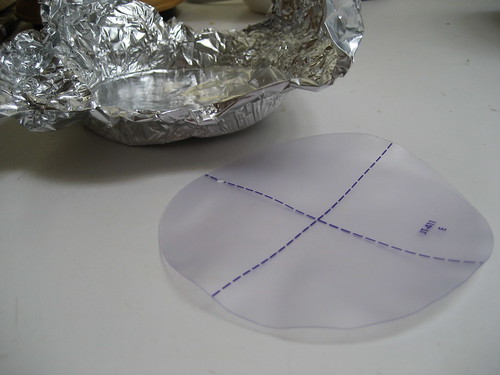
I tried the "jiffy-pop" method and did something totally stupid. I have these plastic templates, and decided to use one of these instead of posterboard since I didn't have any posterboard. As you can probably already guess, plastic melts and warps when it's hot... and one of my templates bit the dust. Oops! I guess that was my blond moment of the day. :)

Oops!


I tried again with cardboard, but it was too thick. I was also having trouble getting the foil smooth around the edges of circles that were so much smaller.

I ended up liking 2 methods better than the others I tried. I loved Naptime Quilter's freezer paper & basting method and it worked really well for the smallest circles I needed to do.

I also loved the technique described in Last Minute Patchwork + Quilted Gifts. The author learned it from Heather Ross but the book didn't include pictures, so I thought I'd do a little photo tutorial. It seems to work great for bigger shapes and I'll definitely use it again.

First copy your pattern on to the back of the circle fabric, leaving at least 1/4 inch around the edges. At this point, you don't need to be fussy about the cutting though.
Circles with fusible interfacing


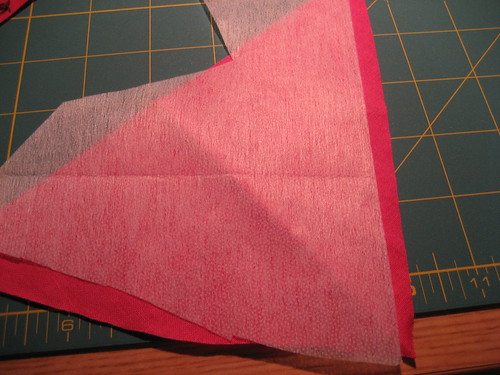
Cut a piece of fusible interfacing that is at least 1/4" bigger than the circle you drew on the fabric. Put the right side of the circle fabric and the fusible (textured) side of the fusible interfacing together.
Circles with fusible interfacing


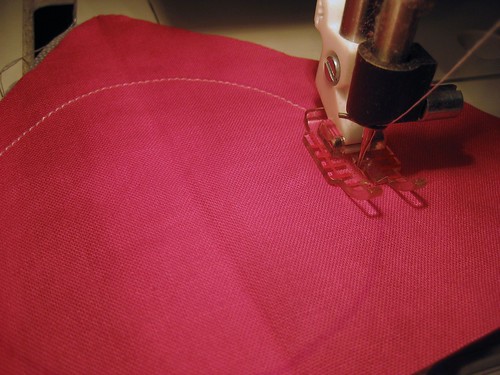
Sew along all the way around the outline you drew.
Circles with fusible interfacing


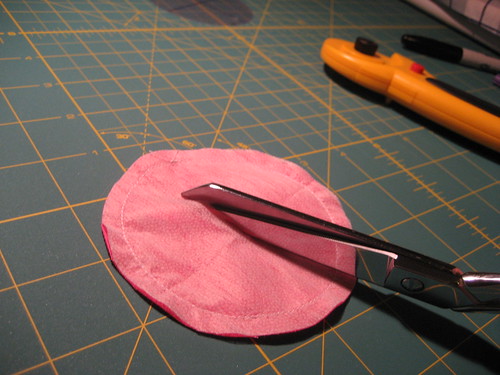
Cut a slit in interfacing.
Circles with fusible interfacing


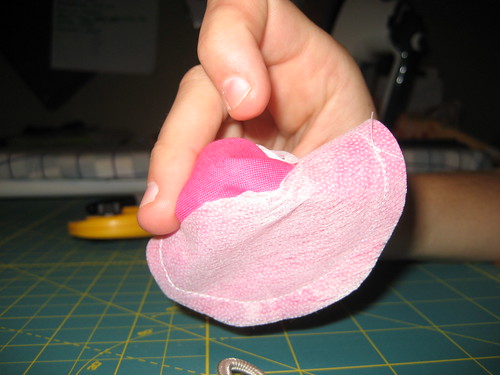
and turn right side out (you should have the fusible side of the interfacing and the right side of the fabric facing out).
Circles with fusible interfacing


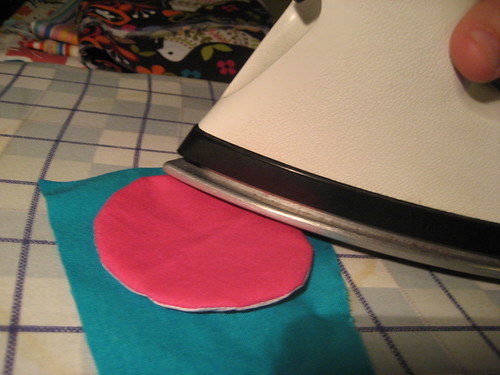
At this point, I was totally skeptical of this method since the circles were really puffy, but after I placed the circle and fused it down with my iron, they looked great. When pressing the appliques, I first pressed the right side of the fabric and then flipped it over to the backside.
Circles with fusible interfacing


Now the appliques should be attached around the edges, and I'm using a ladder/invisible stitch to do this, so it looks like I did a needle turn applique.

Finally, although I didn't do this, you can reduce the bulk under your applique by cutting the background fabric behind the applique. This would allow you to cut off the majority of the fusible interfacing since it is only fused to the background fabric and not the applique itself. Just make sure to leave a 1/4" seam allowance.


I'll show pictures of the block I made for Chen after this weekend's car trip. I figure that's a great time to get some hand sewing done! :)

Edited to Add: Here are some other projects that use this tutorial - Striped Circle block - Block for Chen

Monday, June 22, 2009

Google Reader Trick

Since I think this is pretty cool, I thought I'd share with those of you who use Google Reader. I often feel like I'm missing out when I read people's blogs in my reader, because I miss something since I don't see what they're blog looks like and what's on the sidebars, etc. There's a feature on Google Reader so that you can flip through the actual webpages of the posts in your Reader.

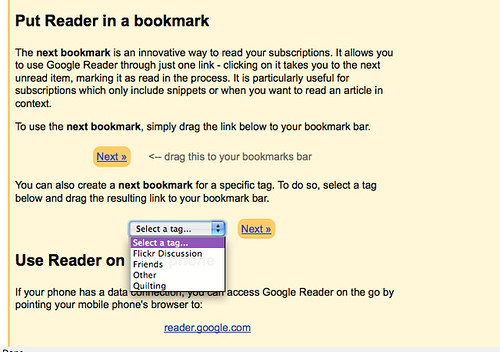
How to Make Google Reader into a Bookmark


You add a bookmark that's called "Next>>" that takes you to the newest unread post in your Reader. I would prefer if it would take me to the next oldest unread item, but hopefully that's in the works... The other annoying quirk is that I can't star items when I view them this way, so I have to search for it back in Google Reader if I want to star it, but on the whole I'm excited!

Here's how to do it:
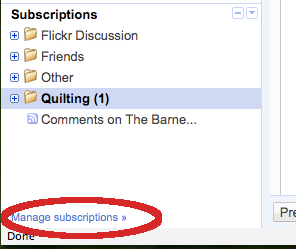
1. Go to "Manage Subscriptions" in the lower left corner of Google Reader
How to Make Google Reader into a Bookmark


2. On the top, click on the tab called "Goodies"
How to Make Google Reader into a Bookmark


3. In the middle, you'll see the link for the "Next>>" button. You just drag it on your bookmarks shortcut bar, and it's done!

4. If you want to be even fancier and only have the Next button for certain tags, you can pick one of those tags for the Next button. You can see that's what I did so I only scroll through my quilting/crafting blogs.
How to Make Google Reader into a Bookmark

Thursday, June 11, 2009

Snipping Sewing and Sending Blocks for Adrienne

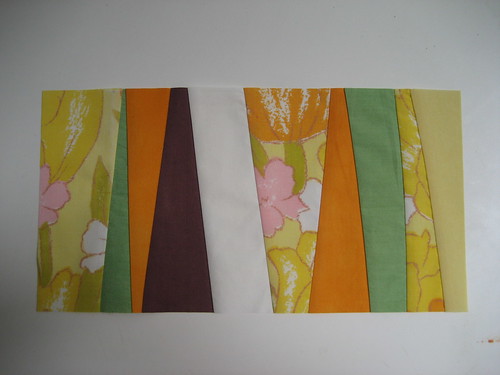
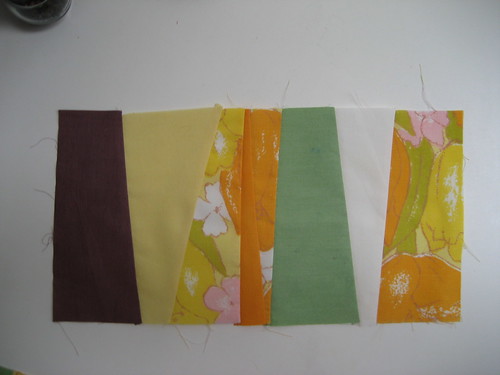
For snip.sew.send. this month, Adrienne sent vintage sheets she thrifted and some were hand dyed! These were new fabrics for me and it was awesome to work with something different. She requested Denise Schmidt Hop, Skip and Jump style blocks.

Following Zonnah, I figured I would share how I ended up accomplishing the task. If nothing else, it's a reference for me to go back to. This was my first time doing wonky free style blocks, so I followed the suggestion of another member of the bee on how to do it.

I cut all the pieces I was going to be working with a little longer than the height of the finished block (I cut to 7" to allow some leeway for a 6.5" block)
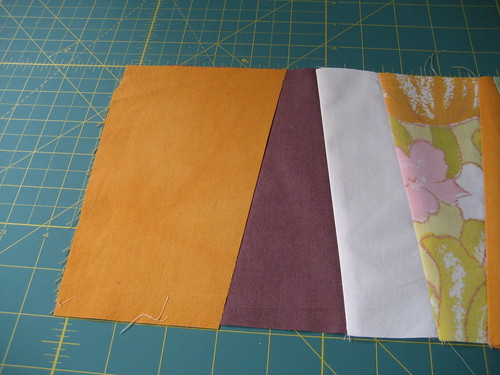
For each piece, I put the new piece on top of the other pieces that were already pieced. Here the orange piece is new and it's already been cut at angle from a previous step.
Snip.Sew.Send Block for Adrienne


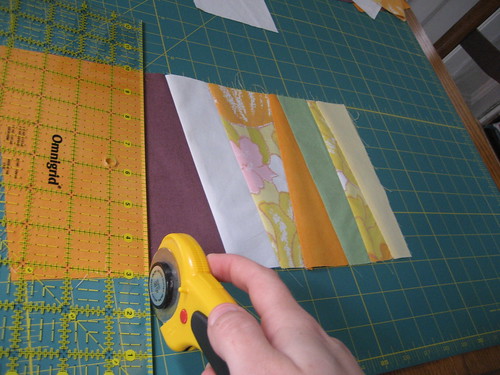
Then I decided how wonky I wanted the seam to be and cut both pieces at that angle (making sure to leave a little extra for the seam allowance.
Snip.Sew.Send Block for Adrienne


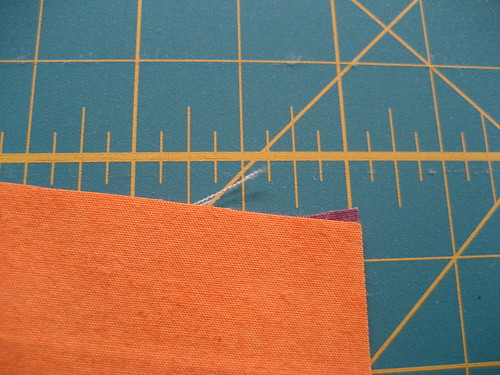
Then I lined up the edges (right sides together) and off set them 1/4" so the pieces would still line up more-or-less straight after I sewed the seam.
Snip.Sew.Send Block for Adrienne


After I had all my pieces sewn together, I trimmed the height to the appropriate length (here 6.5"), and called it good. Here are the results:
Snip.Sew.Send Block for Adrienne


And an extra block that Adrienne said she's going to trim for another part of the quilt.
Snip.Sew.Send Block for Adrienne