
I tried the "jiffy-pop" method and did something totally stupid. I have these plastic templates, and decided to use one of these instead of posterboard since I didn't have any posterboard. As you can probably already guess, plastic melts and warps when it's hot... and one of my templates bit the dust. Oops! I guess that was my blond moment of the day. :)
I tried again with cardboard, but it was too thick. I was also having trouble getting the foil smooth around the edges of circles that were so much smaller.
I ended up liking 2 methods better than the others I tried. I loved Naptime Quilter's freezer paper & basting method and it worked really well for the smallest circles I needed to do.
I also loved the technique described in Last Minute Patchwork + Quilted Gifts. The author learned it from Heather Ross but the book didn't include pictures, so I thought I'd do a little photo tutorial. It seems to work great for bigger shapes and I'll definitely use it again.
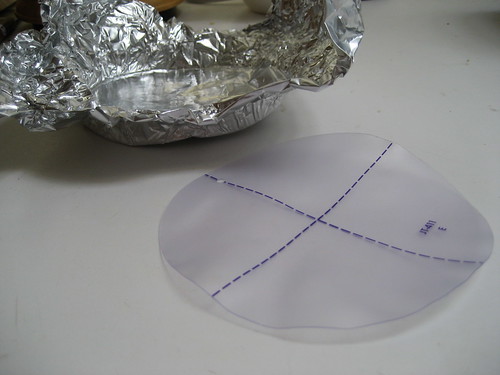
First copy your pattern on to the back of the circle fabric, leaving at least 1/4 inch around the edges. At this point, you don't need to be fussy about the cutting though.

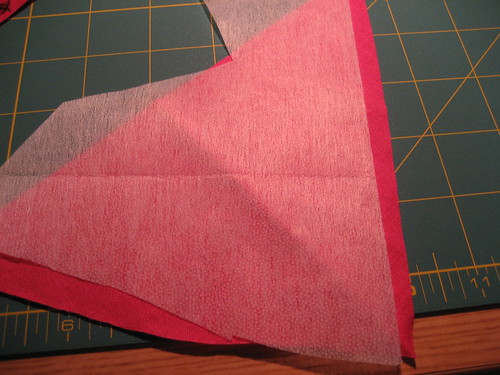
Cut a piece of fusible interfacing that is at least 1/4" bigger than the circle you drew on the fabric. Put the right side of the circle fabric and the fusible (textured) side of the fusible interfacing together.
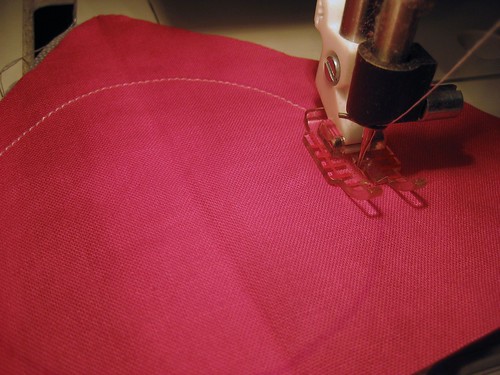
Sew along all the way around the outline you drew.
Cut a slit in interfacing.
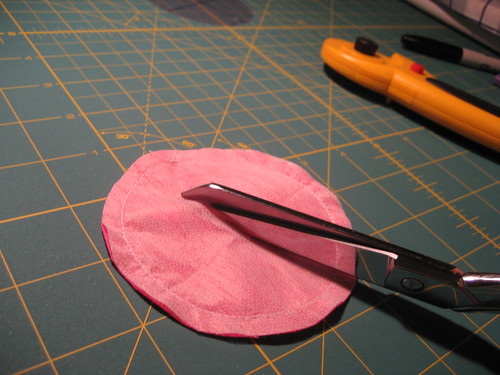
and turn right side out (you should have the fusible side of the interfacing and the right side of the fabric facing out).
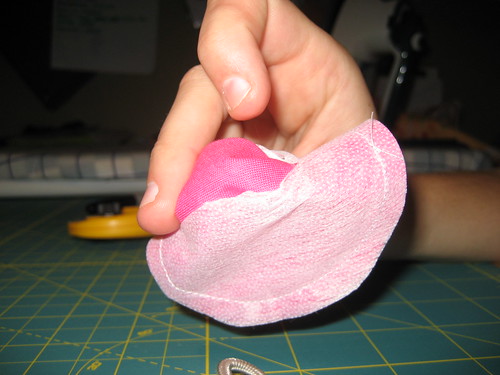
At this point, I was totally skeptical of this method since the circles were really puffy, but after I placed the circle and fused it down with my iron, they looked great. When pressing the appliques, I first pressed the right side of the fabric and then flipped it over to the backside.
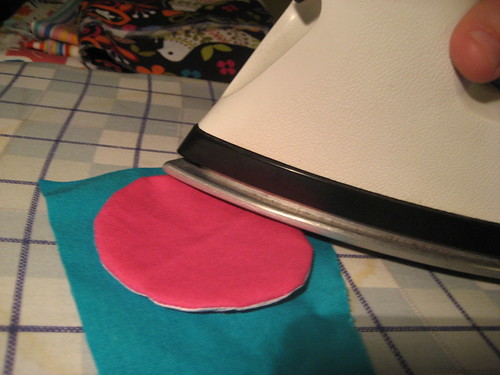
Now the appliques should be attached around the edges, and I'm using a ladder/invisible stitch to do this, so it looks like I did a needle turn applique.
Finally, although I didn't do this, you can reduce the bulk under your applique by cutting the background fabric behind the applique. This would allow you to cut off the majority of the fusible interfacing since it is only fused to the background fabric and not the applique itself. Just make sure to leave a 1/4" seam allowance.
I'll show pictures of the block I made for Chen after this weekend's car trip. I figure that's a great time to get some hand sewing done! :)
Edited to Add: Here are some other projects that use this tutorial - Striped Circle block - Block for Chen


Good tutorial, now i just need to buy some fusible interfacing :) Oh, I can't wait to see your block now!
ReplyDeleteGreat tutorial. I've got the book and wanted to try that method and now I've got pictures to walk me through it :0).
ReplyDeleteOh my, there's going to be hand sewing involved in my block? You are entirely way too good to me. Thank You, can't wait to see it!
How cool, I'll have to give this a try. I also tried foil and an iron but didn't really like the results, but this looks really promising!
ReplyDeleteThat is a great way to do circles! I've never seen that before, its awesome! I always do the freezer paper method which never works out. :) Thanks for stopping by! -Allison
ReplyDeleteI never knew you could do applique like this! Thanks for the tutorial :)
ReplyDeleteJust realised this post is from July! I found it via your tutorial buttons - they're a great addition to your blog!
ReplyDelete